
Once you have pulled the IMSI, Ki, and OPC for every SIM out of your old core, you have to put them somewhere. If you installed the free, open-source version of Rapid5GS, that somewhere is the Open5GS WebUI, which the installer sets up for you as part of the build. In this post I will walk through logging in, changing the default password, and entering subscribers by hand.
The interface is not good. It is a thin admin panel sitting on top of the subscriber database, with no bulk import, no CSV upload, and no concept of a customer. Every SIM is a form you fill out by hand. If you are loading forty SIMs off a spreadsheet you will be at this a while, and you will make a typo somewhere around number twenty-six. Rapid5GS Pro is what we built to fix that. The free core is still a real core, though, and this is how you feed it.
Before You Start: Have Your Key Export Open
You need three values per SIM: the IMSI, the Ki (called the Subscriber Key here), and the OPC (called the Operator Key here). If your SIMs came from Baicells, those three columns come out of the CloudCore BOSS portal in one CSV, and I wrote up exactly where to find it in How to Export IMSI, Ki, and OPC from the Baicells CloudCore. Get that file open in a second window before you start clicking, because you will be copying out of it constantly.
Where the WebUI Lives
The Rapid5GS installer asks you to pick an IP address for S1 and management traffic during setup. That is the address the WebUI answers on. It gets written to /etc/open5gs/install.conf as MGMT_IP, and if you have forgotten which one you chose, that file will tell you.
Point a browser at plain HTTP on that address:
http://<your-management-IP>No port number. Under the hood the Node app listens on 127.0.0.1:9999, and the installer puts nginx in front of it on port 80 so you do not have to remember that. If nothing loads, check that nginx is running and that whatever firewall sits between you and the core is not eating port 80.
That is HTTP, not HTTPS, and you are about to type your core’s admin credentials into it. Keep the management IP on a management network, or reach it over a VPN. Do not put this interface on a public address.
Step 1: Log In With the Open5GS Defaults
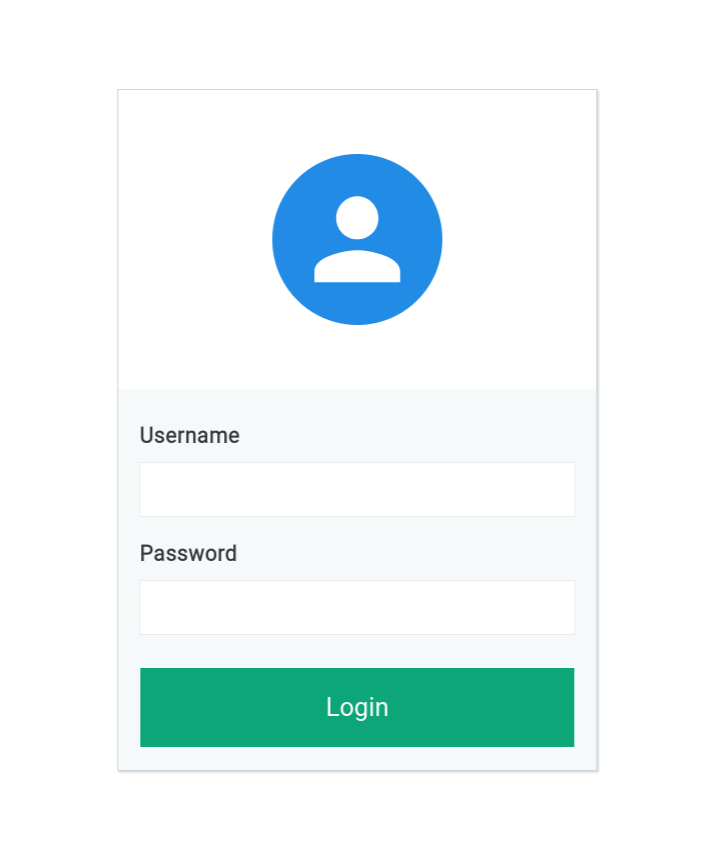
You get a small green login box. The stock Open5GS credentials are:
- Username:
admin - Password:
1423
Step 2: Change That Password Right Now
Everyone running a stock Open5GS install knows those credentials, which means everyone who can reach your management network knows them too. Change it before you do anything else.
Click Account in the left sidebar. You will see a single row for the admin user.
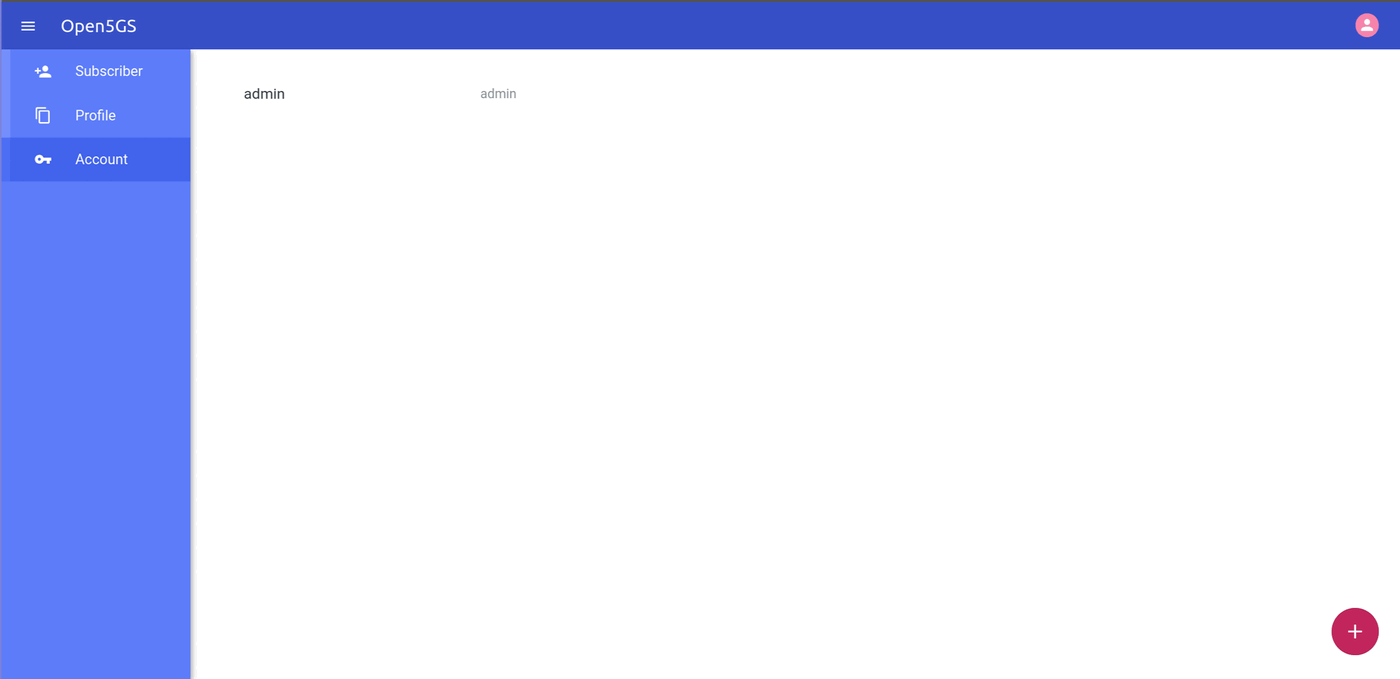
There is no pencil icon and no menu here. Click directly on the account row and the Edit Account dialog opens. Type a real password into Password and Confirm Password, leave Username and Role alone, and hit SAVE.
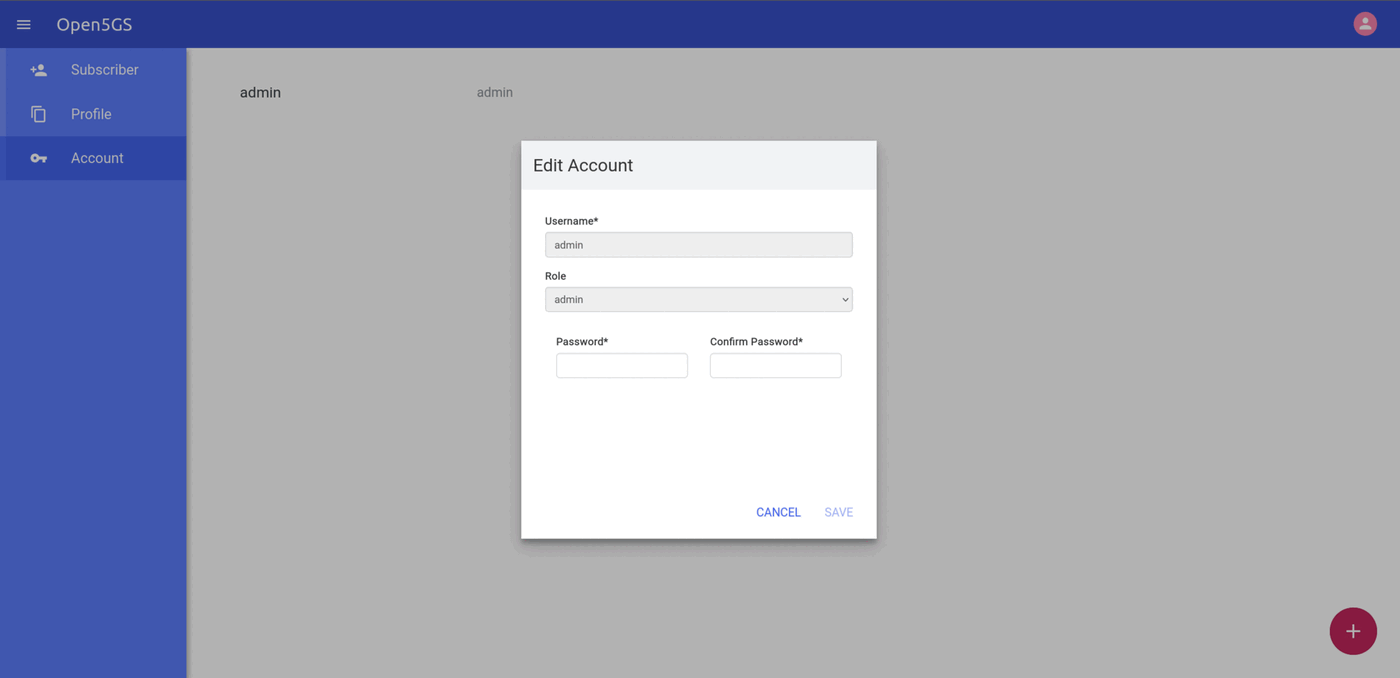
Put the new password in whatever password manager you already use for network gear. There is no recovery flow here worth the name.
Step 3: Open the Subscriber Page
Click Subscriber in the left sidebar. This is the list of every SIM your core knows about, shown as a plain grid of IMSIs. On a fresh install it is empty. On a working core it is a wall of fifteen-digit numbers, which is about as much customer management as this interface offers.
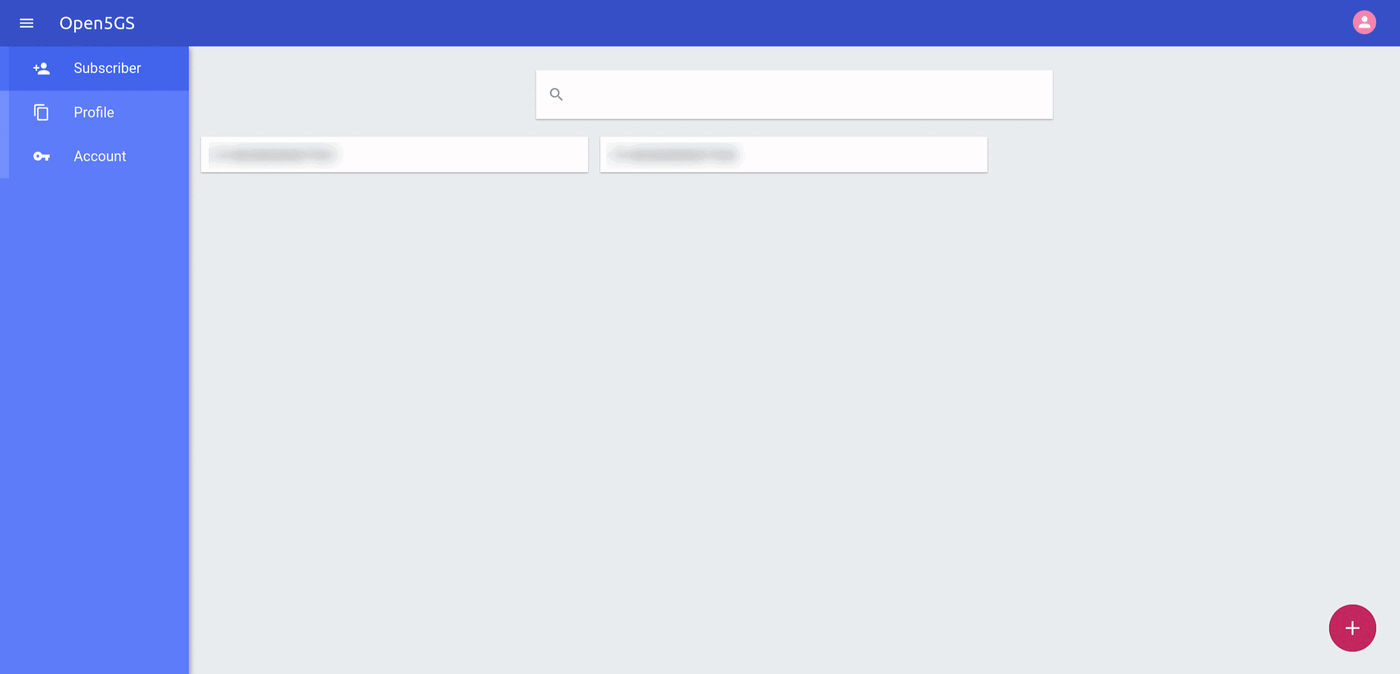
To add a subscriber, click the pink plus button in the lower right corner of the screen. That opens the Create Subscriber dialog.
Step 4: Fill In IMSI, K, and OPc
You will be living in this form. Four fields matter in the top section.
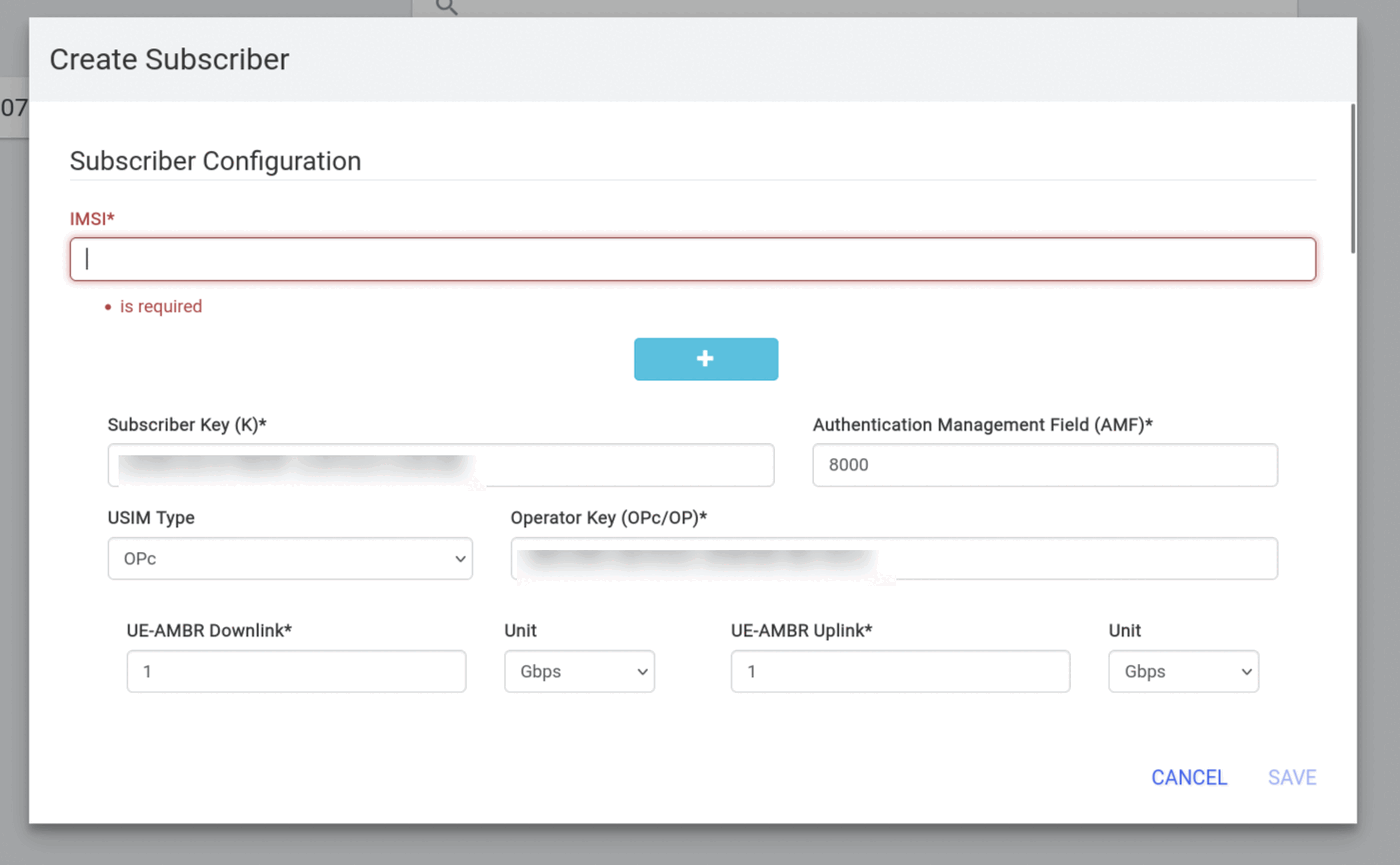
- IMSI: paste it from your export, then check it for spaces. Copying out of a spreadsheet loves to bring a trailing space or a stray character along with it, and the WebUI will happily save an IMSI with a space in it. The SIM then fails to attach and nothing in the logs points at the real problem. Click into the field after pasting and make sure the value is fifteen digits and nothing else.
- Subscriber Key (K): this is your Ki. Paste it from the export.
- USIM Type: leave this on OPc. Baicells and most other vendors hand you an OPC, not an OP, and the two are not interchangeable.
- Operator Key (OPc/OP): this is your OPC. Paste it from the export.
Open5GS pre-fills the K and OPc fields with its own demo values every single time you open this dialog, and they look like real keys because they are formatted like real keys. Overwrite both with your actual values from the export. If you leave the defaults in place the record saves without complaint and the SIM never authenticates.
The Authentication Management Field (AMF) defaults to 8000 and you can leave it alone. Same for the UE-AMBR downlink and uplink values unless you are deliberately shaping per-subscriber rates.
Step 5: Subscriber Status, and How to Suspend a Customer
Scroll down a little and you will find Subscriber Status (TS 29.272 7.3.29), which defaults to SERVICE_GRANTED.

Leave it on SERVICE_GRANTED when you are adding a new subscriber. Remember where it is, though, because this is your non-pay disconnect. When a customer needs to be shut off, come back into their record and change this dropdown rather than deleting the subscriber. Turning them back on is one click, and you have not thrown away their keys.
Step 6: Set 5QI/QCI to 9 and ARP Priority to 8
Keep scrolling to the slice and session configuration, where the DNN/APN for this subscriber lives. On a standard Rapid5GS install that APN is internet, and you should leave the name exactly as it is.
What you do need to change are the two QoS dropdowns underneath it:
- 5QI/QCI: set it to 9
- ARP Priority Level (1-15): set it to 8
These are the values I run on every subscriber, and they matter more than they look like they do. QCI 9 is the standard non-GBR best-effort bearer that LTE data is supposed to ride on. The other QCI values carry scheduling behavior that the radio side of the stack takes seriously, and if you hand your subscribers a class meant for low-bitrate signalling, some eNBs will happily schedule them like low-bitrate signalling. That shows up as a customer who cannot pull their plan speed no matter what you do at the core, and you will spend a day blaming the backhaul. ARP 8 sits in the middle of the 1 to 15 range, which is what you want for ordinary subscribers: no one is preempting anyone else’s bearer, and nobody is stuck at the bottom of the pile.
Adding a Second APN, and Why You Probably Should Not
If you scroll to the bottom of the Create Subscriber dialog, past the UE and SMF address fields and the PCC Rules header, you will find three blue plus buttons.
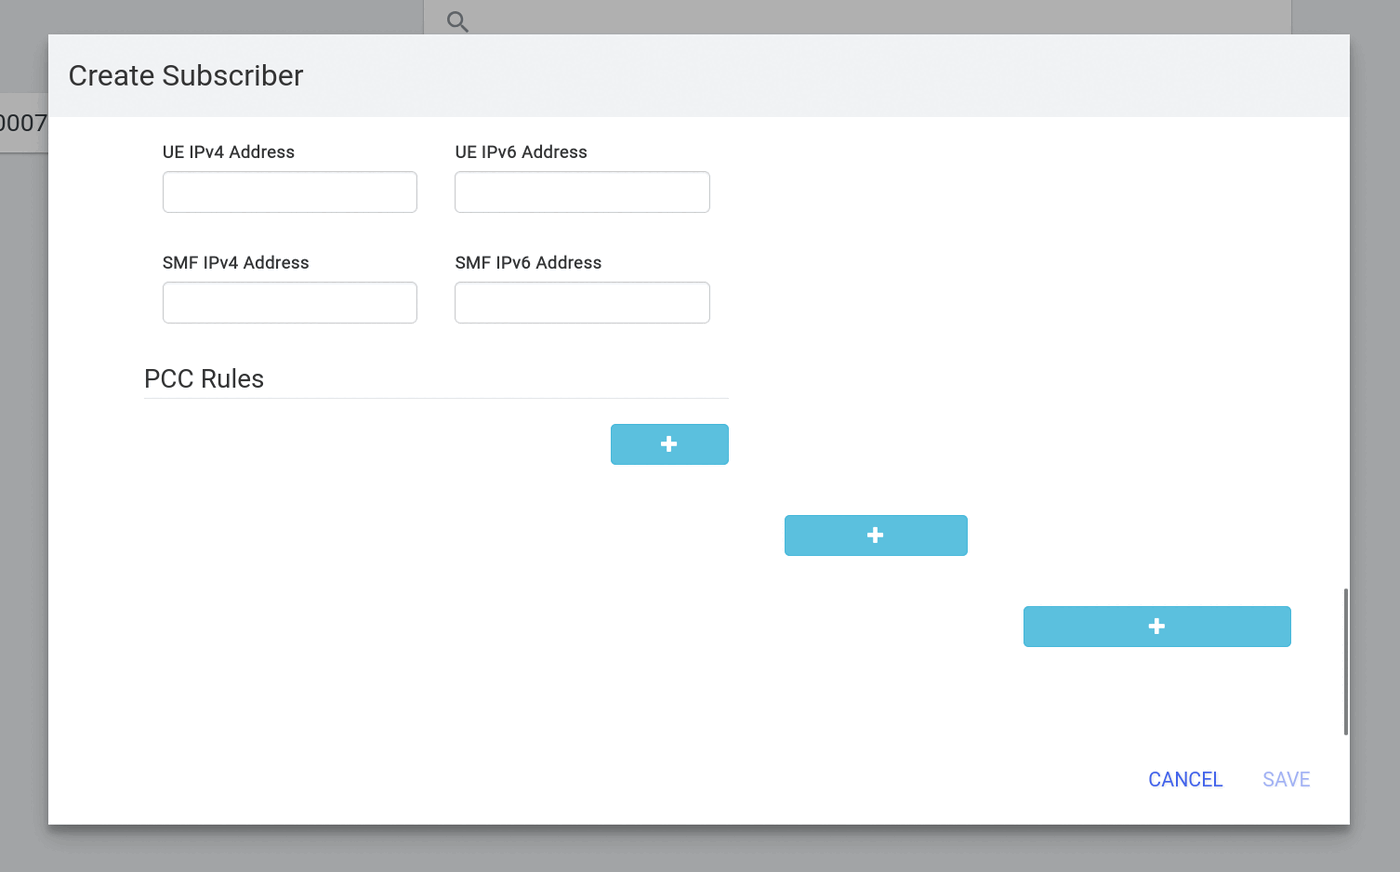
The middle one attaches an additional APN to this subscriber. Clicking it drops in a fresh DNN/APN block for you to fill out.
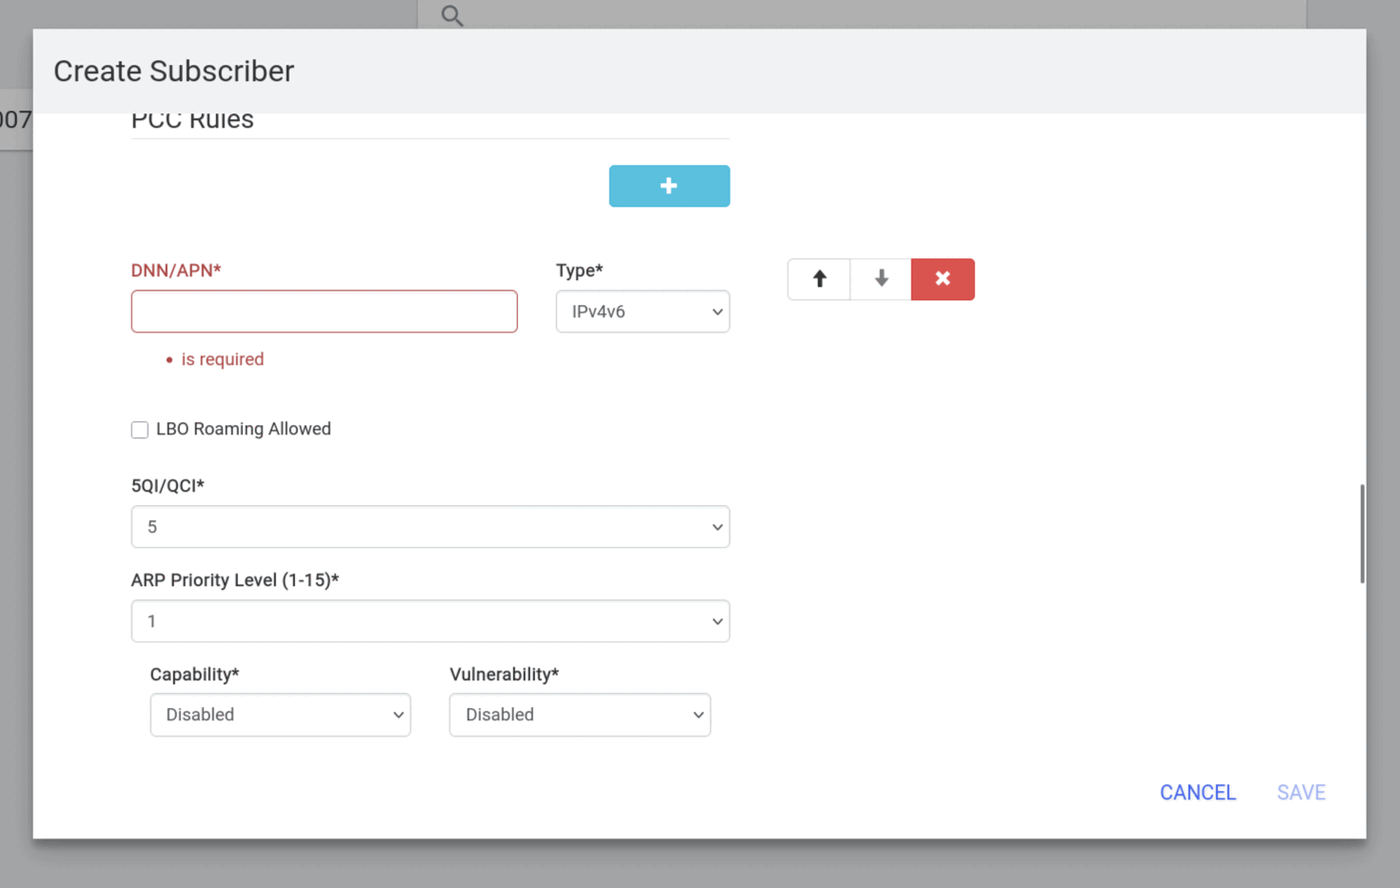
Open5GS defaults a new APN to 5QI/QCI 5 and ARP Priority Level 1. Those are the wrong values for a data bearer, for the reasons above. Change them to 9 and 8 the same as the primary APN.
The bigger issue is that an APN you type here does not exist until the core knows about it. The WebUI will let you save any name you like, but the SMF is what actually hands out addresses, and a standard Rapid5GS install ships exactly one session pool: the stock internet APN on 10.45.0.0/16. Rapid5GS does not touch the session block during install, so a second APN means adding a matching session pool to /etc/open5gs/smf.yaml by hand, then making sure the new subnet is covered by the NAT and forwarding rules the installer set up for the UE subnet. Miss either piece and the session request fails at attach.
Do not do this unless you have to. Custom APNs are worth the trouble in exactly one situation, which is migrating from another core where your CPEs are already provisioned with a fixed APN you cannot change in the field. If that is not you, leave internet alone and move on.
If you bought a Nokia AZQC site kit or Rapid5GS Pro from us, this is one of the things your included consulting hours cover. We do the smf.yaml session pools and the matching routing with you, instead of leaving you to find out at attach time that the APN was never real.
Step 7: Save
Hit SAVE and the subscriber appears in the grid. That is the whole cycle. Now do it again for the next SIM.
When you are grinding through a list, do five and then boot a CPE on one of them to confirm it attaches. If it does, your copy-paste mapping between spreadsheet columns and form fields is right and the rest is mechanical. If it does not, you have five records to check instead of forty.
Leave the Profile Tab Alone
You will notice a Profile item in the left sidebar sitting between Subscriber and Account. Ignore it completely. It is a template feature that a standard Rapid5GS core setup does not use, and touching it will not do anything for you except create confusion later when you cannot remember why a subscriber has settings you did not type. Subscriber and Account are the only two pages you need.
What the Free WebUI Costs You
Everything above works, and the free Rapid5GS core is a capable packet core. The stock WebUI is what it is, though:
- No bulk or CSV import. Every SIM is a hand-filled form.
- No customer records. You get a grid of IMSIs, so the mapping from an IMSI to a human being lives in your spreadsheet or your billing system.
- Demo keys pre-filled on every new subscriber, waiting for you to forget to overwrite them.
- QoS defaults that are wrong for subscriber data and have to be corrected on every record.
- One admin account, no roles worth using, and no record of who changed what.
That is what Rapid5GS Pro fixes. Same core underneath, with a real operator interface on top: import your SIM export as a file instead of typing it, attach subscribers to actual customer records, and stop hand-correcting QCI on every add. If you are running more than a couple dozen SIMs, the Pro UI pays for itself the first time you provision a batch.
Frequently Asked Questions
What is the default Open5GS WebUI username and password?
The stock Open5GS WebUI credentials are username admin and password 1423. They are the same on every default install, so change the password from the Account page the first time you log in.
What IP address is the Open5GS WebUI on in Rapid5GS?
It answers on the management IP you selected during the Rapid5GS install, over plain HTTP on port 80. That address is stored in /etc/open5gs/install.conf as MGMT_IP. The Node application itself listens on 127.0.0.1:9999 and the installer configures nginx to proxy to it.
How do I change the Open5GS WebUI admin password?
Click Account in the left sidebar, then click directly on the admin row. There is no separate edit button. The Edit Account dialog opens with Password and Confirm Password fields; fill both and hit Save.
What 5QI/QCI and ARP values should I use for subscribers?
Use 5QI/QCI 9 and ARP Priority Level 8. QCI 9 is the standard non-GBR best-effort class for subscriber data, and ARP 8 puts everyone at the same reasonable priority without anyone preempting anyone else. The Open5GS defaults of QCI 5 and ARP 1 can cause the RAN to schedule subscribers as if they were low-bitrate signalling traffic.
Why won’t my SIM attach after I added it to the Open5GS WebUI?
Check three things in order. First, look for a stray space or extra character in the IMSI field, which pasting from a spreadsheet frequently adds. Second, confirm you actually overwrote the pre-filled demo K and OPc values with the real ones from your key export. Third, confirm your core’s PLMN matches the MCC and MNC at the front of the IMSI.
Can I add a custom APN in the Open5GS WebUI?
You can type one, but it will not work on its own. A standard Rapid5GS install ships a single session pool for the stock internet APN on 10.45.0.0/16. Any additional APN needs a matching session pool added to /etc/open5gs/smf.yaml plus NAT and forwarding rules for the new subnet. Only worth doing if you are migrating CPEs that are already locked to a fixed APN.
Need a Hand?
If you are staring down a list of a few hundred SIMs and this workflow is making you reconsider your career, you do not have to do it yourself.
Both Rapid5GS Pro and the Nokia AZQC 3-Sector CBRS Site Kit include 8 hours of remote consulting from us, and migration work is exactly what those hours are for. We import your SIMs, configure the SMF, and get the core answering with your subscribers already loaded, so the screens above are something you read about rather than something you spend a weekend on. If you need radios to go with the core, our refurbished Baicells 436Q eNBs ship HaloB-included and Rapid5GS-ready.
Reach me at hello@theedgemile.com.
For the full picture of the free core, the radios we have verified against it, and when Pro makes sense, start at our Rapid5GS open source hub.

[…] and a paste behavior that will put a space in your IMSI. I walked through the whole process in How to Add Subscribers in the Open5GS WebUI, including the default login, the password change you should do first, and the exact 5QI/QCI and […]
[…] Your SIMs. If you are moving off Baicells CloudCore, you need your subscriber keys out first: exporting IMSI, Ki, and OPC from CloudCore. Then add those subscribers in the Open5GS WebUI. […]